 LeCoqRoti
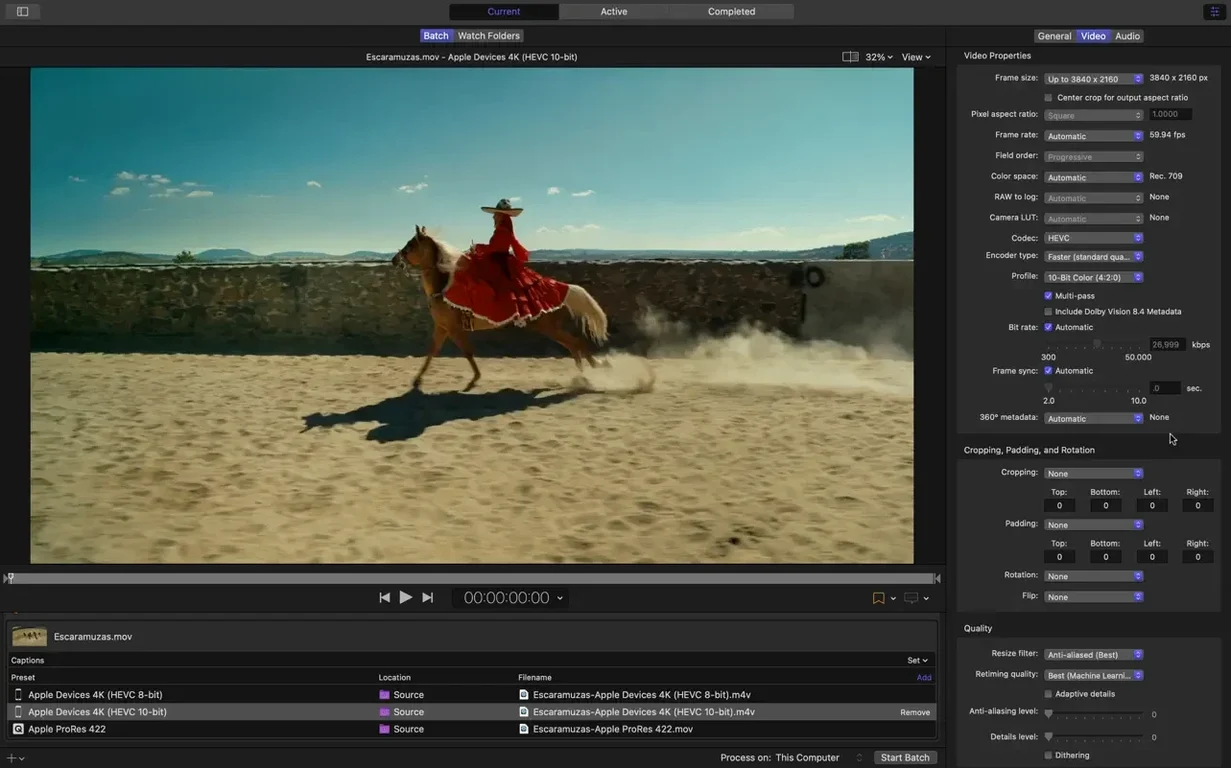
If you use Final Cut Pro, you already know a version of Compressor: the two share the same rendering engine, so a setting you configure here can appear directly in Final Cut’s export panel. That connection runs deep — Motion completes the trio, and Compressor is the dedicated transcoding hub that turns editing timelines into delivery files without guesswork.
Hardware-accelerated encoding: speed with precision
Compressor taps the hardware encoders for H.264 and HEVC built into Apple silicon and Intel Macs. The practical result is faster export without trading away quality control: you still set frame sizes, data rate limits and colour space manually. On Apple silicon devices, HEVC data rate limits are now supported, giving you finer constraint over file size before encoding begins. The app also distributes work across multiple CPU cores, so a batch of encodes scales with the machine it runs on.
Post-encode actions: the delivery chain, automated
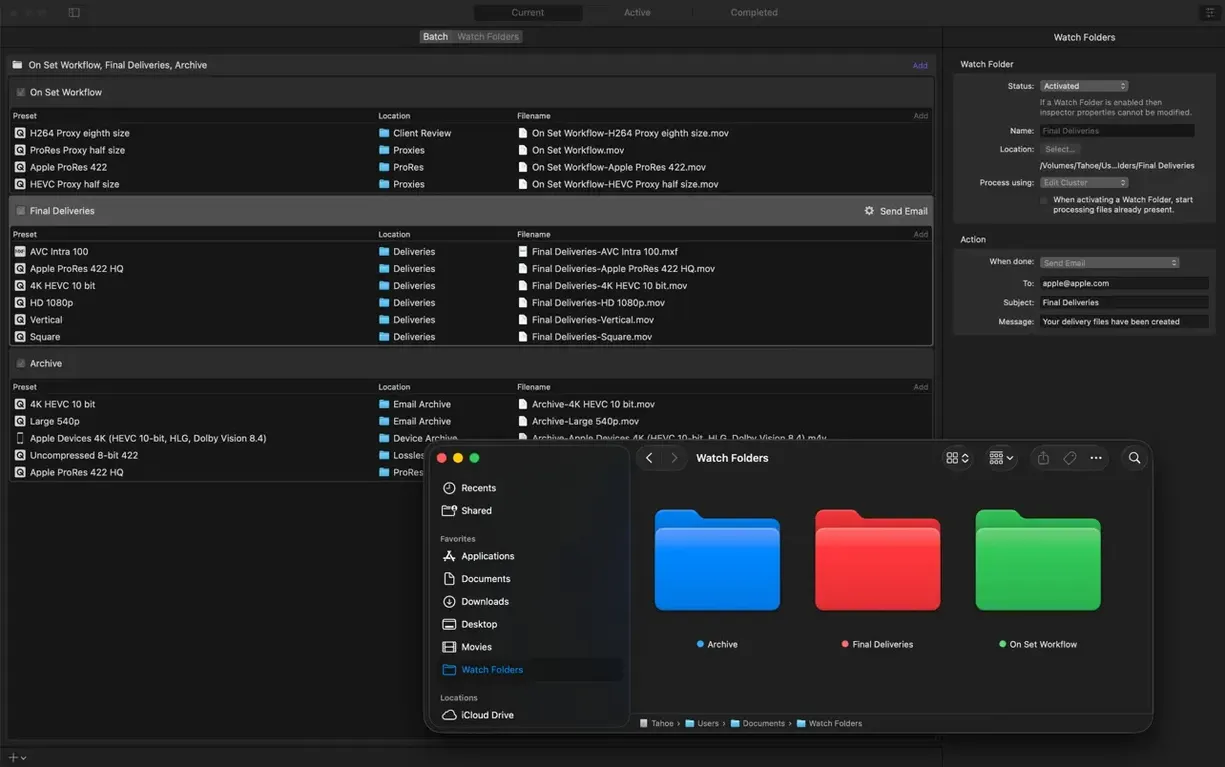
Encoding is rarely the last step. Compressor lets you attach actions that run automatically once a file is written: email it, copy or move it to a watched folder, or trigger a custom script. For facilities managing review copies or archiving, this turns the app into a quiet automation engine. The range of supported formats reinforces that role — 360° video, HDR, HEVC and MXF are all handled, and the new immersive metadata viewer helps you inspect spatial media before committing to a long encode.
Common beginner mistakes: a few things to watch for
One of the first traps is treating Compressor like a simple format converter — dropping a file, picking a preset, and hitting start — without glancing at the inspector. The inspector holds per-setting audio and video properties that override the preset defaults, and skipping it often explains why a file comes out stereo when you need 5.1, or why the data rate balloons. Another early slip is ignoring the batch template name field. When you add multiple sources and forget to set distinct output names, files overwrite each other silently; Compressor does not warn you, it simply replaces the earlier file with the last one encoded.
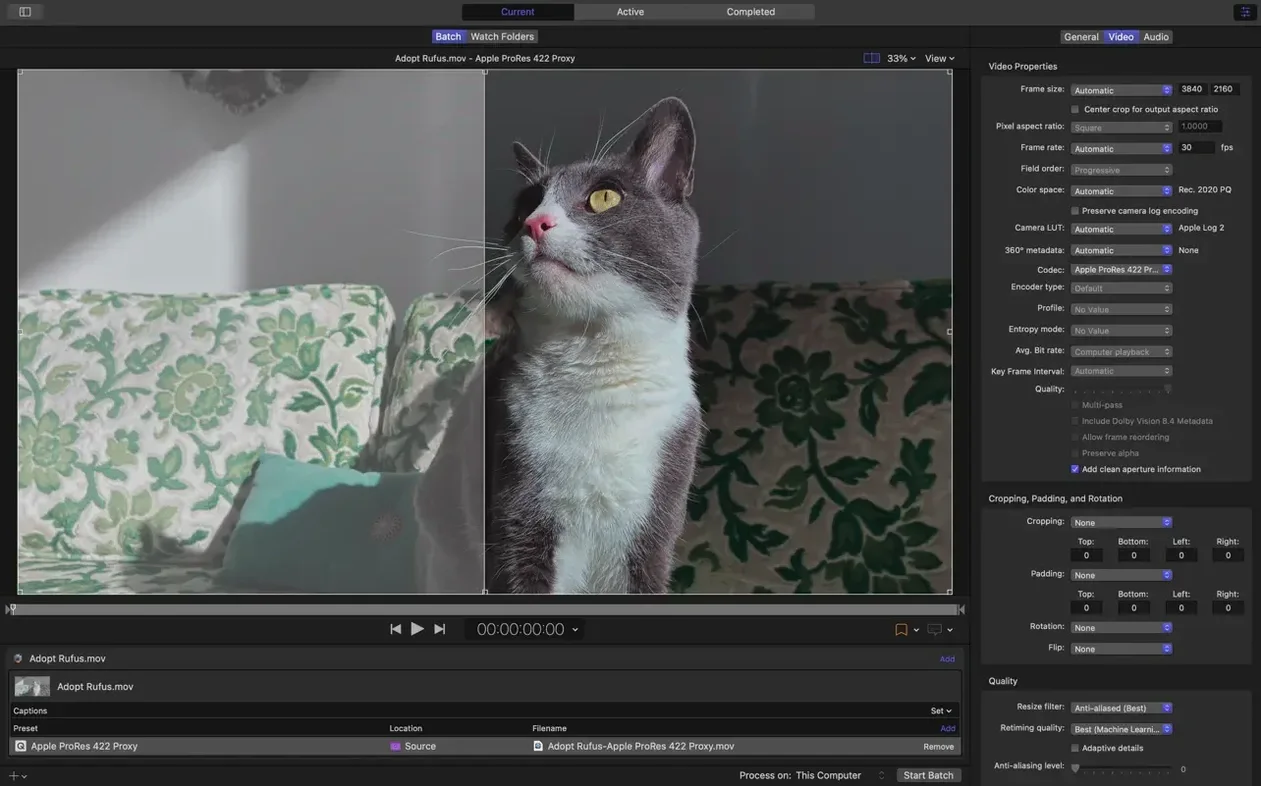
Beginners also tend to underuse the preview window. It is not there just to admire a frame: the split-view comparison shows the source against the intended output with the applied filter, letting you catch a colour shift or a cropping error before encoding forty minutes of it. A related habit is enabling frame resizing without checking the pixel aspect ratio; a 1440×1080 anamorphic source scaled to square pixels needs a manual correction, otherwise faces stretch or squash. Finally, distributed encoding is powerful, but new users occasionally activate it without realising that all instances must have the same version of Compressor and the same codecs installed, or the cluster stalls with cryptic errors.
Where Compressor sits among other Mac tools
Compressor is designed to fit into a narrow space and stay there. It is not a timeline editor, so you will not cut, grade or mix inside it. The natural companion is Final Cut Pro: you send a project or a bundle of clips as a batch, and Compressor inherits its rendering engine, so what you see in Final Cut’s viewer is what the encode delivers. Motion projects can also be routed through Compressor, particularly when you need an output format that Motion’s own export does not list.
Outside Apple’s suite, Compressor works well as a post-encode processor for apps that can write a master file but lack advanced delivery presets. DaVinci Resolve, for instance, can render a ProRes 4444 master to a watched folder, and Compressor can pick it up, transcode to HEVC with HDR metadata, and copy the result to a media server. The same watched-folder trick applies to After Effects renders. On the macOS side, Compressor’s output can feed into Shortcuts or Automator via the custom script action, making it part of a larger tagging, archiving or upload pipeline without a human clicking anything after the initial setup.
HandBrake vs. Compressor: audience, not just codecs
Three other transcoding apps sit on Mac desktops for similar reasons, and they differ in intent more than in raw capability. HandBrake is a capable open-source encoder aimed at a general audience: it handles a wide range of codecs and offers a deep set of filters, but it has no distributed encoding, no integration with professional editing timelines, and no post-encode automation beyond a simple queue. Where Compressor feels like a pro delivery station, HandBrake feels like a precise single-purpose tool.
Adobe Media Encoder is Compressor’s closest rival. It integrates tightly with Premiere Pro and After Effects, supports watch folders, and renders in the background while you keep working. The interface is busier, and its queue management favours Adobe’s ecosystem. Compressor counters with deeper Final Cut and Motion ties, a cleaner inspector panel for advanced audio and video properties, and the ability to distribute work across multiple Macs on a local network — something Media Encoder does not offer without third-party add-ons.
ffWorks (a Mac front-end to ffmpeg) sits at the other end of the spectrum: it exposes an enormous parameter set and supports almost every format imaginable, but it assumes you know what a pixel format flag or an x265 profile is. Compressor wraps that complexity inside a visual inspector and a side panel of managed settings. For a colourist or an editor facing a delivery sheet, Compressor reads the spec and builds the preset; with ffWorks, you build the spec line by line. Neither approach is wrong, but they serve different temperaments.
A practical workflow: HEVC master with audio stems
Imagine a short film finished in Final Cut Pro, intended for a festival that requests an HEVC 4K master with a stereo mix and separate 5.1 stems. Here is a way through it using Compressor alone.
Start in Final Cut Pro: with the project open, choose File > Send to Compressor. The timeline appears in Compressor’s batch window as a single source. Add two output rows to this source. On the first row, apply the Apple Devices 4K (HEVC 10-bit) preset, then open the inspector. Under Video, confirm frame size and data rate; the HEVC data rate limits on Apple silicon are now available, so you can cap the peak rate at 30 Mbps without guesswork. Under Audio, switch from the default stereo track to a 5.1 AAC setting — the newly added 5.1 AAC option in the Apple Devices group saves you from building a custom audio layout. Name the output file ShortFilm_4K_HEVC_51.
On the second output row, apply the same Apple Devices 4K preset but keep the audio as stereo AAC. Name it ShortFilm_4K_HEVC_ST. Now set a post-encode action on the first row: choose Add Post-encode Action > Copy File and point it to a festival deliverables folder on an external drive. On the second row, add an email action if the director wants an immediate review copy. Before submitting, open the immersive metadata viewer to check that no spatial metadata has crept in from a 360° source used earlier in the project — a quick sanity check that costs ten seconds.
Click Start Batch. Compressor encodes both versions simultaneously, distributing frames across CPU cores. When it finishes, the 5.1 file sits in the deliverables folder and the stereo copy arrives in the director’s inbox with no extra steps. A compressor workflow built this way turns a delivery list into a single button press, which is precisely what the app was designed to do.








Correspondence 0
Take a chair or join the table to send a letter.
No correspondence on this note yet. Letters are read before they appear.