 LeCoqRoti
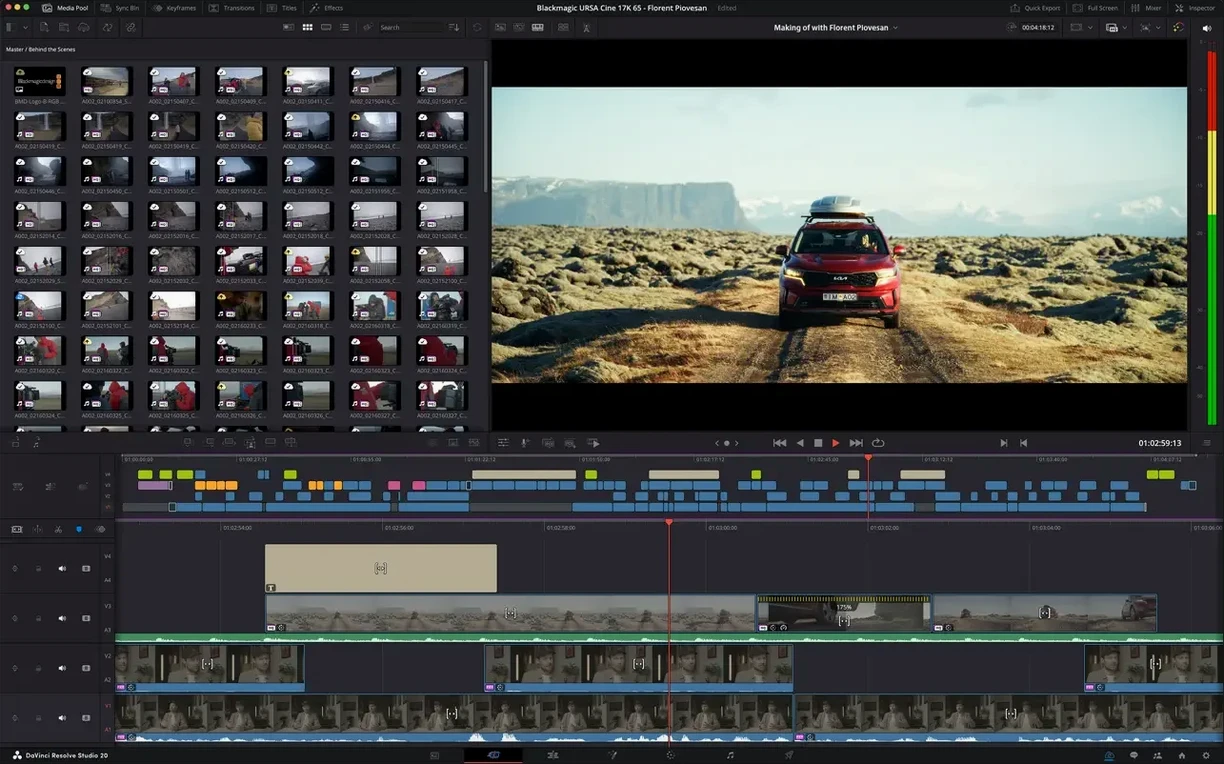
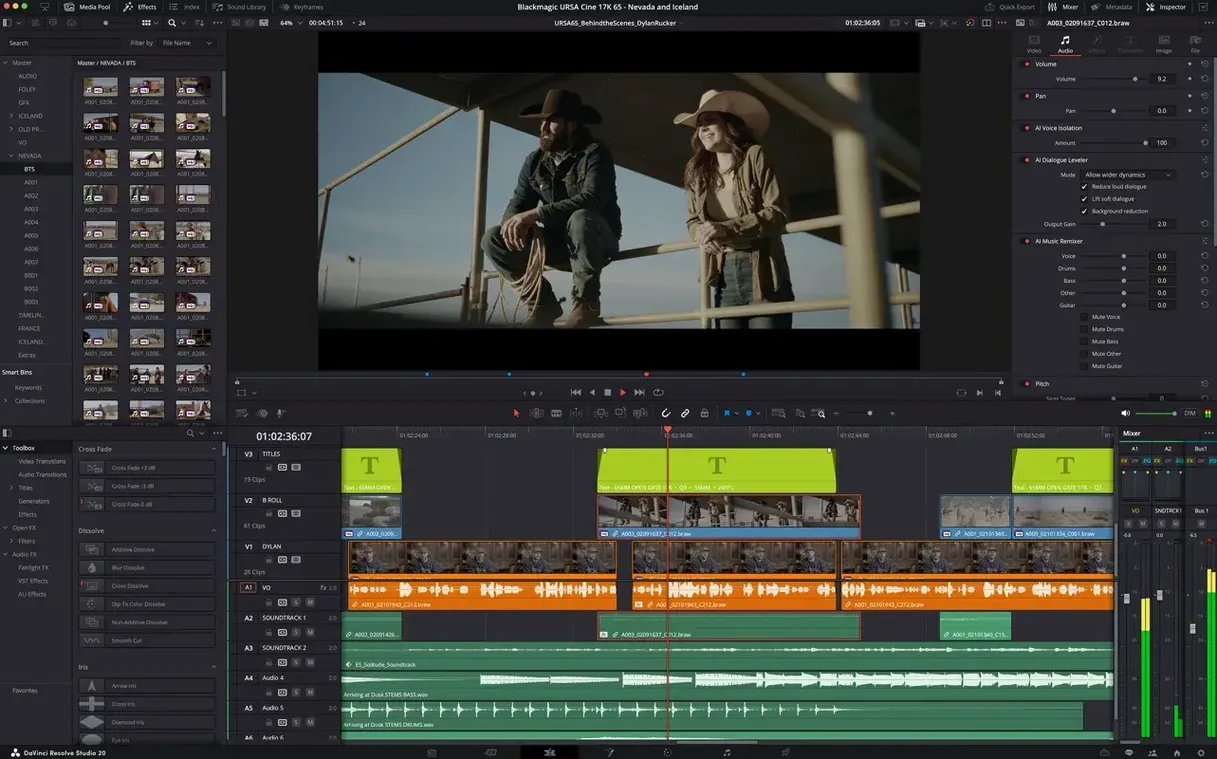
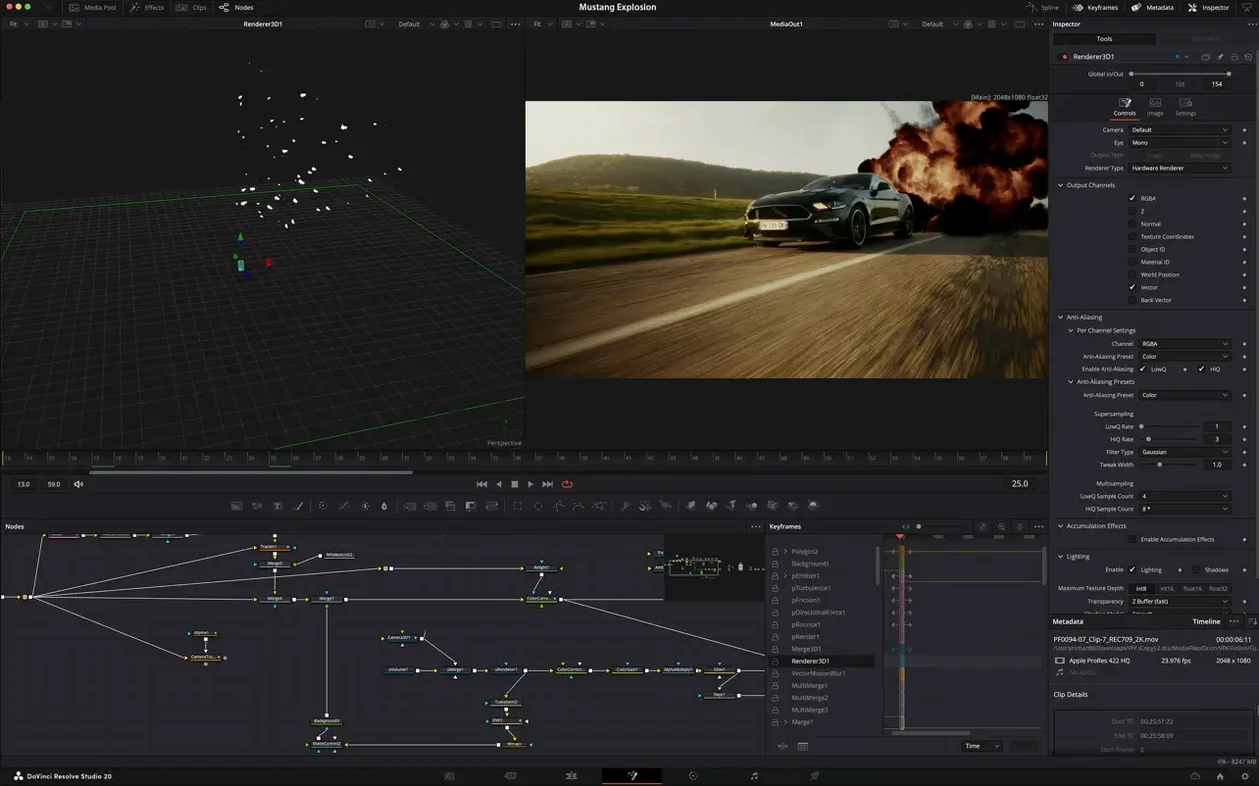
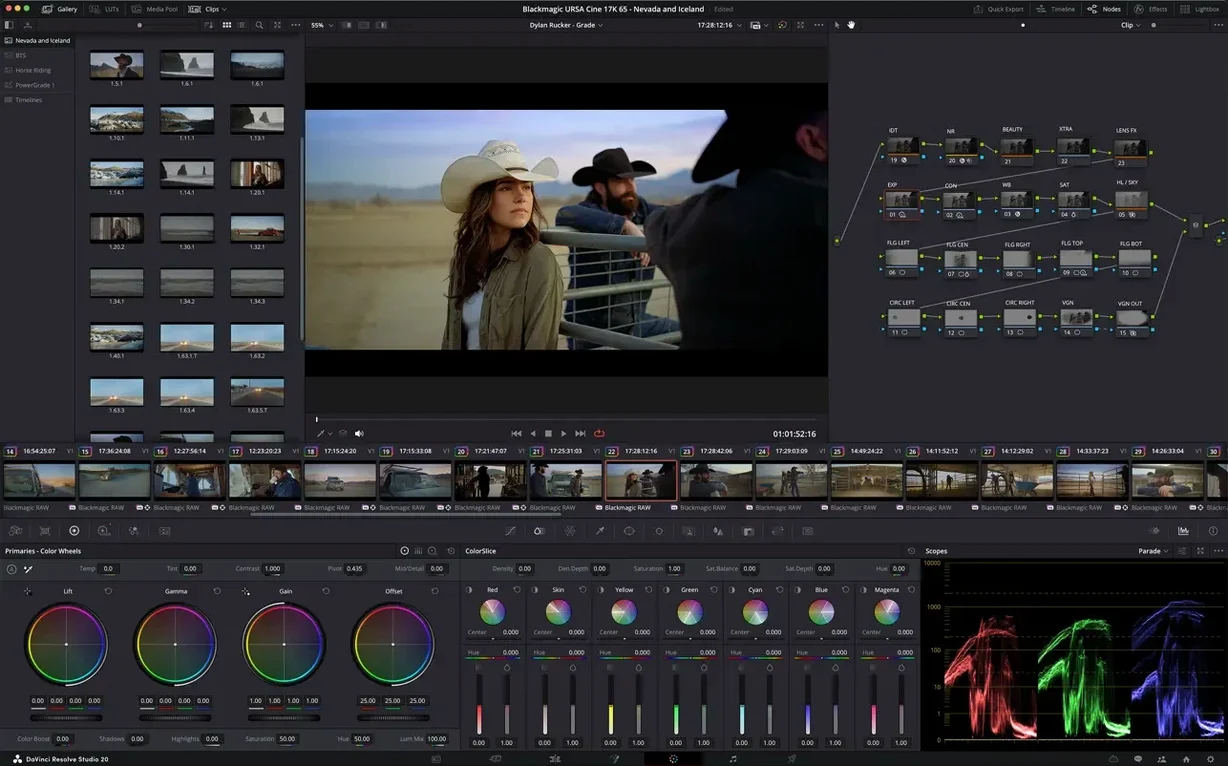
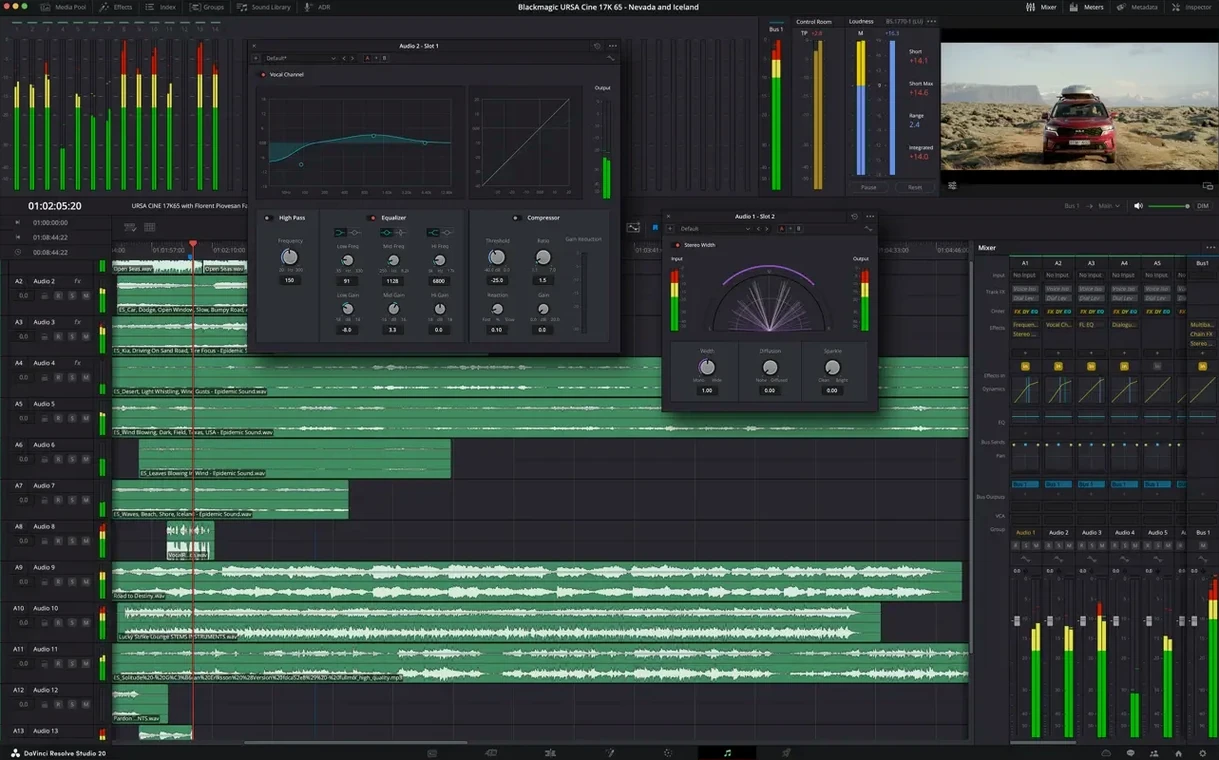
A cut that needs refining, a grade that feels flat, a mix that has lost its balance: the friction of moving a timeline between specialised applications can erode the flow of a project. DaVinci Resolve Studio is designed to keep that state intact by housing editing, colour correction, visual effects, and audio post-production within a single application. For the Mac user who already relies on a handful of precise tools, it earns its place by collapsing several stages of finishing work into one unbroken workspace.
A suite in one place: four rooms under one roof
The Studio edition brings together the Cut and Edit pages for assembly, the Fusion page for compositing, the Color page for grading, and Fairlight for audio mixing and mastering. Switching between them feels less like launching separate programs and more like stepping between adjoining rooms. This structural choice removes the technical chore of conforming timelines or relinking media across applications, so the creative decisions stay in the foreground.
Rushes-to-edit handoff: where it picks up
Many Mac users already have a preferred still-image editor, a vector tool, and perhaps a dedicated audio recorder or screen-capture utility. DaVinci Resolve Studio does not attempt to replace those; it steps in at the point where rushes become a sequence. A colourist might move from Capture One stills into the Resolve timeline for a consistent look across motion and print. A sound designer can finish a rough assembly in Fairlight before sending stems to a dedicated DAW. The 21.1 update tightens these connections further, with hardware-accelerated HEIC decoding on Apple Silicon and expanded camera format support on the Photo page, so stills from modern hybrid cameras arrive with less friction.
Workflow: a promo edit from import to final render
A short promotional film for a local atelier offers a useful path through the application. The footage arrives from a hybrid camera as a mix of HEIC stills and compressed video; the Photo page absorbs both, and the expanded camera format support in 21.1 means the stills require no prior conversion. Media is organised into bins by location and take, with the AI assistant suggesting keyword groups that can be accepted or refined. From there, the Edit page receives a rough assembly: wide shots establish the workshop, close-ups carry the craft details, and a single slow push-in holds the final product.
The grade follows on the Color page. A shared node structure keeps the contrast consistent across all clips, while a second node isolates the warm timber tones without affecting skin. The 32-bit floating-point processing leaves room to recover a slightly overexposed window in the background. Fairlight then balances the voice-over against the room tone, and a light compressor on the master bus keeps the levels even for social delivery. The project finishes with a batch render of three aspect ratios, a task the 21.1 AI assistant can queue without further manual setup.
Scenario: a colourist moving between stills and motion
A retoucher who spends most mornings in a still-image workflow often needs to extend a campaign look into short video clips. The stills arrive as graded references; the motion files arrive log-encoded and flat. DaVinci Resolve Studio lets this user build a look on the Color page using the same tonal language they would apply to a raw still: a gentle lift in the midtones, a restrained saturation curve, a slightly cool shadow. The expanded Photo page support in 21.1 means the HEIC stills open alongside the video without an intermediate export, and the colourist can compare a still reference against a paused frame in the viewer while adjusting nodes. The result is a set of video clips that sit naturally beside the print images, without a round trip through another application.
Mistakes beginners make: three habits to notice early
The first common error is treating the Color page as a set of global sliders. Grading with a single correction applied to the whole clip limits the very control that makes the application worth learning. A better habit is to separate exposure, colour balance, and local adjustments into distinct nodes early on, so each decision can be revised in isolation.
The second is ignoring audio until the final export. A picture edit that works in silence often falls apart once dialogue, room tone, and music occupy the same space. Fairlight rewards attention at the assembly stage, when small level adjustments inform the rhythm of the cut.
The third is skipping project settings before importing media. Frame rate, resolution, and colour management choices made after an edit has begun can produce subtle mismatches that only appear at render. Setting these parameters first, and saving them as a project preset, removes a source of late-stage corrections.
Colour pipeline: one deliberate choice that stabilises the viewer
A few preferences repay an early visit. Under project settings, colour science deserves a deliberate choice rather than a default: selecting a managed colour pipeline from the start keeps the viewer consistent across the Edit and Color pages. On Apple Silicon, the hardware-accelerated HEIC decoding in 21.1 makes still-heavy timelines feel noticeably lighter, and the GPU setting should match the machine's capabilities rather than remain on an automatic fallback.
In Fairlight, assigning keyboard shortcuts for trim and level adjustments before a serious mix session reduces the amount of mouse travel. On the Edit page, enabling duplicate frame indicators and audio waveform display on clips provides immediate visual cues that speed up assembly without changing the interface's character.
Finishing your own cut: the built-in colour and sound advantage
Editors who finish their own work benefit most directly, since the application removes the need to hand a project to a separate colourist or sound mixer for small refinements. A documentary editor can move from a rough cut to a broadcast-ready master in the same session, with the grade and mix evolving alongside the edit rather than after it. Colourists working with hybrid stills and motion gain from the expanded Photo page support, while compositors who occasionally need a full finishing pipeline find Fusion and the new Krokodove tools in 21.1 integrated rather than bolted on.
Users who work across several Macs, or who move between a studio machine and a laptop, appreciate that the project structure remains consistent on both Intel and Apple Silicon hardware. The single-application design means fewer compatibility checks between separate programs, and fewer chances for a sequence to lose a plug-in or a colour transform in transit.








Correspondence 0
Take a chair or join the table to send a letter.
No correspondence on this note yet. Letters are read before they appear.