 LeCoqRoti
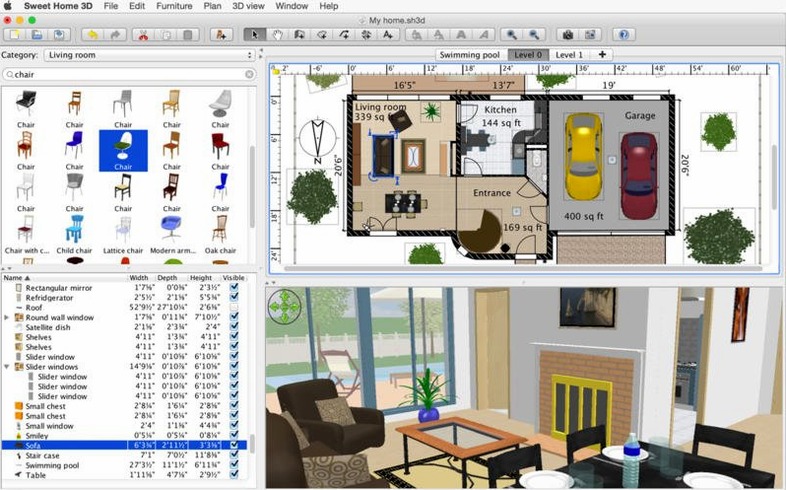
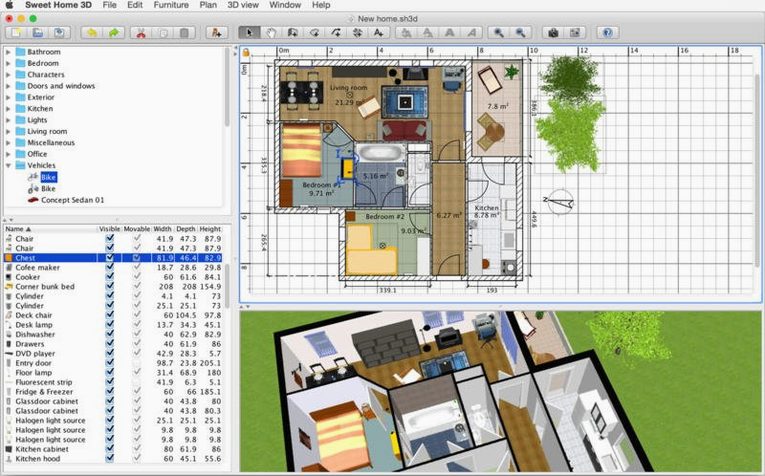
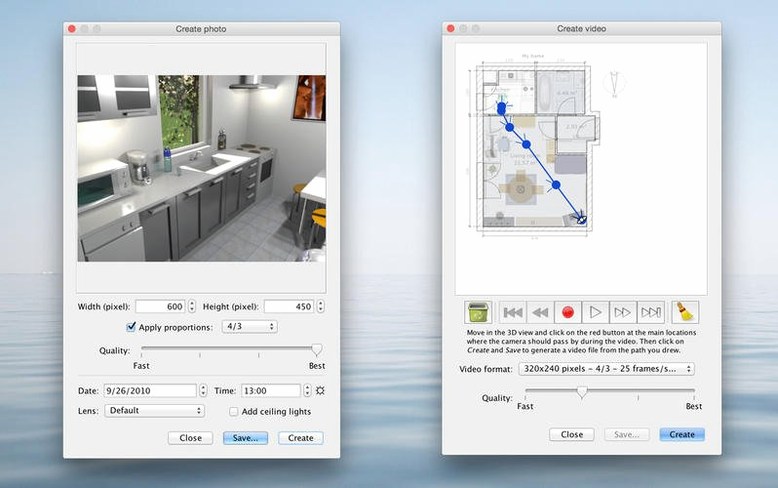
People who are planning a renovation or simply rearranging a room reach for it first: a way to draw walls, place furniture, and then walk through the result before anything is real.
Plan drawing — walls and rooms are traced on one or more levels, with dimensions that stay accurate.
3D view — the scene updates live from an aerial view or a visitor's-eye viewpoint as you work.
Surface finishes — wall, floor and ceiling colours or textures can be changed to match real samples.
Photorealistic renders — still images are generated with adjustable light and sun positions, good for presenting to a client or partner.
Video walkthroughs — a moving 3D path through the rooms can be created and exported.
Printing — both the flat plan and the 3D view can be sent to paper, which helps when measurements need to be shared on site.
Zero-height walls: why your 3D view stays empty
An empty 3D view when a plan is clearly drawn. The most frequent cause is a wall height set to zero — the walls exist in plan but have no vertical dimension, so the 3D window shows nothing. Check the wall properties and enter a sensible value, typically around 250 cm for a standard room.
Furniture that refuses to sit on a higher floor. Each piece must be assigned to the correct level in its properties panel. Dragging a chair onto the first-floor plan while it is still tagged to the ground floor leaves it floating in the wrong elevation, invisible from the viewpoint you expect.
Render times that stretch into minutes. The photorealistic engine calculates light bounces by default at a high quality setting. For quick previews, reduce the image size and lower the quality slider to medium or draft — the result is less polished, but you will know within seconds whether the lamp placement is working.
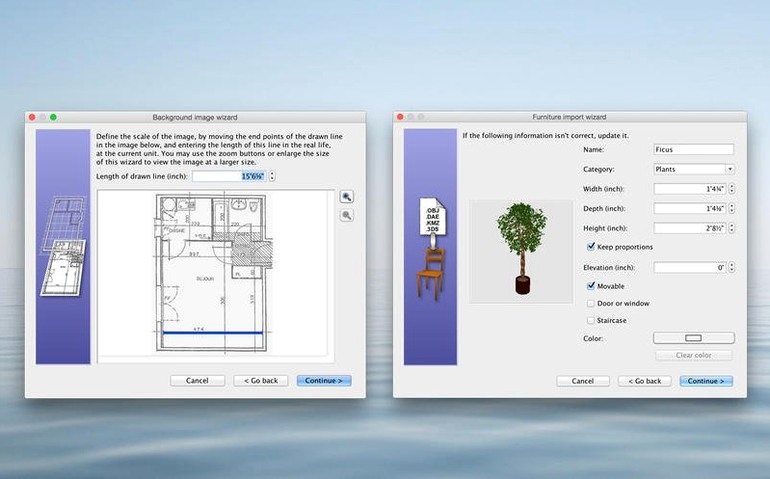
Strange shadows on imported models. Objects downloaded from community sites sometimes arrive with their normals inverted or their scale wildly off. Select the model, open Modify furniture, and check the dimensions in centimetres. A sofa that arrives as a 2 cm cube needs rescaling before it will behave properly under the scene's lights.
Library depth: where Sweet Home outruns Live Home 3D
Live Home 3D is the nearest neighbour. It shares the plan-plus-3D approach and runs natively on macOS, with a somewhat slicker renderer and a stronger library of branded furniture. Where Sweet Home pulls ahead is the catalogue depth built by years of user contributions — if you need a specific IKEA cabinet or an unusual plumbing fixture, the community objects are hard to match. Live Home 3D feels more polished on first launch; Sweet Home rewards the person willing to dig into import formats and object editing.
SketchUp Free (in browser) offers true 3D modelling freedom that no dedicated home planner can match. You are not confined to rectangular rooms or catalogue items. The trade-off is speed: sketching a five-room apartment with doors and windows takes far longer in SketchUp than in a tool that treats walls as first-class objects. Sweet Home is a floor-plan tool that thinks like a floor-plan tool; SketchUp is a modeller that happens to handle buildings.
Room Arranger runs on the Mac and shares the drag-and-drop furniture concept, but it stops at the 2D plan. No 3D walkthrough, no renders. It is useful for quick space planning, yet anyone who needs to show a client what the light looks like at four in the afternoon will gravitate towards Sweet Home's 3D view and sun-position controls.
Single-project planners: a kitchen, bedroom, or studio visualised
The application fits three groups particularly well. First, homeowners and renters planning a single project — a kitchen refit, a bedroom layout change, a garden studio — who need a visual answer without learning architectural software. They draw a room, pull in furniture from the catalogue, and get a render that settles the argument with a partner.
Second, interior design students and freelancers who present concepts regularly but cannot justify subscription tools. The OBJ export matters here: a plan built in Sweet Home can be roughed out quickly, then exported for detailing in a dedicated 3D package if the project demands it.
Third, DIY renovators who need printed plans with measurements on site. The ability to dimension walls and place notes directly on the 2D view, then print at scale, turns the app into a lightweight drafting companion. A builder can read a Sweet Home printout as easily as a CAD sheet, provided the scale is marked clearly.
Skipping level heights: how overlapping walls begin
Drawing walls without setting level heights first. The default elevation of 0 cm works for a single-storey plan, but adding a second floor without adjusting the base elevation of the new level leads to walls that overlap in the 3D view. Set the level elevation in the level properties before drawing anything on it.
Placing furniture before the room is closed. An object dropped onto the plan will sit at the default floor elevation regardless of gaps in the walls. Later, when the missing wall segment is added and a room boundary is detected, the floor may recalculate and the furniture can end up partly embedded. Close the room first, furnish second.
Ignoring the light source panel. Many first-time users add ceiling lights from the catalogue and wonder why the room stays dim. The catalogue lamps are geometry only; they do not emit light unless a light source is added separately through the Add light command and positioned inside the fitting. Without at least one light source, the renderer has only the sun to work with, which means a windowless room renders black.
Using the visitor viewpoint without adjusting the camera height. The default eye level is set for a standing adult, around 170 cm. For a seated perspective or a child's-eye view — useful when designing a nursery — the camera height needs to be lowered manually in the 3D view modification panel. Leaving it at the default produces walkthroughs that feel oddly tall in small rooms.








Correspondence 0
Take a chair or join the table to send a letter.
No correspondence on this note yet. Letters are read before they appear.